In the previous posts of this series, the focus was on deploying OCUDU on Kubernetes and optimizing the data plane. We looked at SR-IOV, DPDK, and different deployment scenarios to get a performant gNB up and running.
A real deployment, however, does not stop at moving traffic. Once a gNB is live, it needs to be observable, configurable, and manageable from the outside.
In this post, we enable the management plane of OCUDU and connect the gNB to an SMO-style environment using the O1 interface.
How does the OCUDU gNB implement O1?
The ocudu-gnb Helm chart implements the O1 management interface using a three-container architecture within a single Kubernetes pod.
A NETCONF server container provides the standardized O1 NETCONF interface. It stores the gNB configuration as 3GPP-compliant XML models such as NRCellDU and GNBDUFunction and exposes them to external management systems like SDN-R.
The o1-adapter container acts as the integration layer. It translates between the XML-based NETCONF configuration model and the gNB’s native YAML configuration format. In addition, it collects metrics and events from the gNB and forwards them as VES (Virtual Event Streaming) notifications to the SMO.
The workflow starts when the o1-adapter connects to both the NETCONF server and the gNB’s WebSocket API. When an operator performs configuration changes through the NETCONF interface, the o1-adapter receives the update, converts the XML configuration into the native YAML format, and writes it to /etc/config/gnb-config.yml. The gNB entrypoint script monitors this file and triggers an application restart whenever a change is detected.
At the same time, the o1-adapter subscribes to real-time metrics and alarms from the gNB, formats them as 3GPP-compliant VES events, and sends them to the VES Collector. From there, the events are forwarded to Kafka and made available to the SMO’s analytics and monitoring components.
This design provides full O1 compliance while keeping the gNB’s native configuration simple. The Helm chart manages the integration complexity through ConfigMaps for the initial O1 XML configuration, Kubernetes-based service discovery for SMO components, and lifecycle coordination. External access is provided via a Kubernetes NodePort service, allowing SDN-R to establish NETCONF call-home sessions for centralized RAN management, fault supervision, and performance monitoring.
Target Deployment Scenario
The configuration for this example focuses only on the SMO integration. Other features such as logging or metrics are disabled. If you want to learn more about configuring those components, have a look at the previous post in this series.
For demonstration purposes, I will also show how to deploy the OCUDU SMO Lite Helm chart. This chart does not deploy a fully functional SMO. Instead, it provides a minimal proof of concept that demonstrates the O1 functionality of the OCUDU gNB. It supports configuration management and alert handling.
For the gNB, I am aiming for the following configuration:
- Interface for DPDK via the SR-IOV plugin
- O1 enabled
- Logging and metrics disabled (console logs only)
- Testmode enabled
Helm Configuration: OCUDU Management Plane and O1
In this section, we look at how the OCUDU values.yaml needs to be structured in order to enable the management plane and expose the O1 interface. The actual values are intentionally omitted here and will be filled in later.
It is very important to understand that the XML configuration version must align with the version of the NETCONF server. If this is not the case, the gNB will fail to start. Only use known-to-work combinations of example XML configurations and o1-adapter or NETCONF server image tags. If you diverge from these combinations, you are on your own.
Deployment Configuration
As a first step, I enable the SR-IOV configuration, disable direct host network access, and assign the required capabilities.
sriovConfig:
  enabled: true
  extendedResourceName: "intel.com/intel_sriov_dpdk"

network:
  hostNetwork: false

securityContext:
  allowPrivilegeEscalation: false
  capabilities:
    add:
      - IPC_LOCK
      - SYS_ADMIN
      - SYS_RAWIO
      - NET_RAW
      - SYS_NICE
  privileged: false
For more information about these settings, have a look at the previous blog post in this series. For this scenario, I disable the N2/N3 LoadBalancer, the metrics service, and persistent debugging logs.
service:
  enabled: false

metricsService:
  enabled: false

persistence:
  enabled: false
o1-adapter and NETCONF Configuration
Below is an example O1 configuration section from the ocudu-gnb Helm chart.
o1:
  enable_ocudu_o1: true
  netconfServerAddr: "localhost"
  o1Port: 830
  healthcheckPort: 5000
  oamIpv4Address: "onap-smo-ves-collector.onap"
  log_level: "INFO"

  ws:
    host: "localhost"
    port: 55555

  ves:
    host: "onap-smo-ves-collector.onap"
    port: 8443
    username: "sample1"
    password: "sample1"

o1Adapter:
  image:
    repository: registry.gitlab.com/ocudu/ocudu_elements/ocudu_oran_apps/ocudu_o1_adapter/o1_adapter_nightly_amd64
    pullPolicy: IfNotPresent
    tag: 20260213_76a68ab9
  resources: {}
  securityContext: {}

netconfServer:
  service:
    type: NodePort
    nodePort: 30830
  image:
    repository: registry.gitlab.com/ocudu/ocudu_elements/ocudu_oran_apps/ocudu_netconf/netconf_nightly_amd64
    pullPolicy: IfNotPresent
    tag: 20260213_95ac1772
  resources: {}
  securityContext: {}
This configuration can be used as-is. Only change values here if you know exactly what you are doing. In case you are debugging issues I recommend setting log_level: "DEBUG" for a more verbose output.
The NETCONF server currently only supports NodePort, you can change the port but don’t change the type.
O1 XML Configuration
The o1Config section defines the gNB configuration using 3GPP-compliant XML data models instead of the native YAML format. It mirrors the structure of the regular OCUDU configuration but expressed through standardized 3GPP Network Resource Models.
- ManagedElement acts as the root container, equivalent to the top-level configuration
- GNBDUFunction contains DU-level settings such as cell configuration and RRM policies
- GNBCUCPFunction and GNBCUUPFunction define CU control and user plane parameters
- NRCellDU holds cell-specific radio parameters
Each element follows the 3GPP NRM schema and maps directly to native configuration concepts such as PLMN IDs, tracking areas, and slice definitions.
Within this standard structure, SRS-specific extensions are embedded using custom XML namespaces like urn:srsran-nrcelldu-extension:1.0. These extensions contain OCUDU-specific parameters that are not part of the 3GPP standards, such as OFH timing parameters, DPDK configuration, testmode settings, and metrics collection preferences.
This is the most error-prone part of the O1 configuration. The XML format changes over time, and the configuration must match the NETCONF server version used by the container image.
To avoid errors, my usual approach is to start with a known-to-work XML configuration and a matching NETCONF or o1-adapter image tag, and then adjust only the necessary values.
Example config: gnb-sriov-o1-values.zip
Deploying the SMO Helm Chart (PoC Only)
Before deploying the SMO, it is important to be explicit about its scope.
The SMO Helm chart used in this post:
- Is not production-ready
- Is intended purely as a proof of concept
- Exists only to demonstrate O1 connectivity to the OCUDU gNB
Example config: smo-lite.zip
The example SMO configuration file can be used as-is. I assume that the OCUDU gNB Helm chart has already been deployed as described above.
After deploying the SMO, access its WebUI at:
http://<node-ip>:30080/Connecting the SMO to the gNB and Validating Integration
Once both the gNB and the SMO are deployed, the final step is connecting them and validating that management operations work as expected.
Log in to the WebUI using the credentials:
- Username: root
- Password: root
To connect the SMO to a gNB instance, go to the Connection tab and click the plus icon in the top-right corner. Enter the required connection data. In this example, the worker node runs on 10.12.1.181. Choose a name for your node and set the IP. Use username root and password root, the port is the NodePort, by default this is 30830.
Once connected, you can modify the gNB configuration. As a test, change the number of emulated UEs when running in testmode.
Therefore go to Configuration -> ManagedElement[ran1] -> .
GNBDUFunction -> du1 -> srs_gnbdufunction_extensions -> srs_gnbdufunction_testmode_extensions
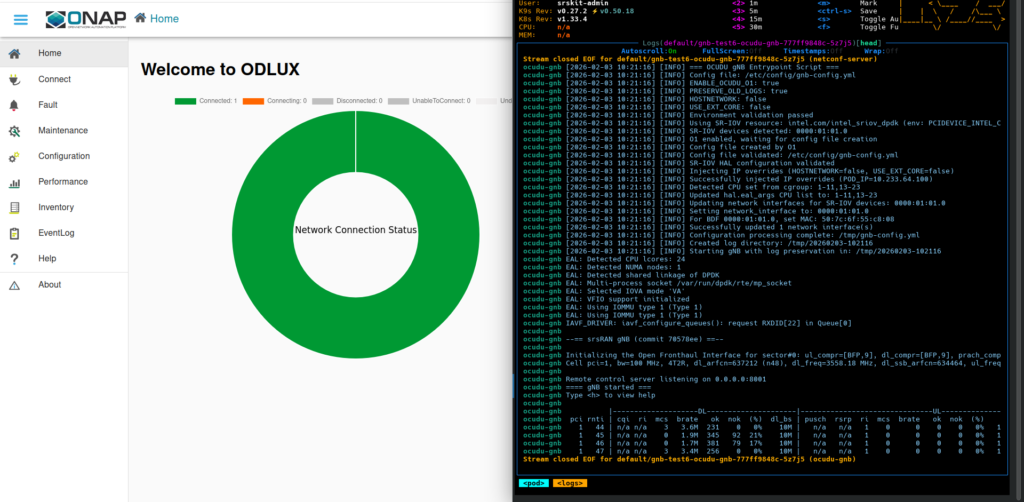
Click the pen icon in the top-right corner to edit the configuration, change the value, and save it using the floppy disk icon. A few seconds after saving, you should see in the gNB logs that it restarts. The container itself does not restart; instead, the gNB triggers an internal application restart.
Common Issues
Some common problems encountered during this step include:
- Using an XML configuration that does not match the container image
- Connecting to the wrong port instead of the gNB NodePort, typically
30830 - Incorrect hostnames or non-working DNS
These checks usually resolve most integration issues quickly.
Operability Beyond the Data Plane
This post shows that OCUDU is not only about data plane performance. Operability and manageability are first-class concerns built into the platform.
By leveraging Kubernetes, management plane components can be exposed in a clean, controlled, and repeatable way.
The SMO setup shown here is intentionally minimal. A full SMO deployment deserves its own dedicated post. What matters is that the foundation is now in place.